2026 Top Guide How to Install a Custom Fit Cabin Air Filter?

Time:2026-10-14 Author:Amelia
0%

A clean cabin begins with a correctly fitted filter. Yet many drivers replace this small component without checking airflow direction, housing shape, or sealing edges. This guide, titled “2026 Top Guide How to Install a Custom Fit Cabin Air Filter?”, explains the process with practical detail. You will learn how to identify the correct filter, open the cabin-filter compartment, remove the old unit, and seat the replacement without crushing its pleats.

John Nielsen, a former AAA automotive engineering expert, has emphasized, “A cabin air filter helps keep dust, pollen, and other airborne contaminants out of the vehicle’s passenger compartment.” His point matters because the filter affects more than comfort. A clogged filter can reduce blower performance, create weak airflow, and leave a musty smell near the vents. Still, the filter cannot solve every air-quality problem. That is worth remembering.

How to install a custom-fit cabin air filter? Start with the vehicle manual or a trusted parts catalog. Confirm the year, model, engine configuration, and filter code. Some housings sit behind the glove box. Others are beneath the dashboard, where a small flashlight becomes useful. Notice the arrow marked “AIR FLOW.” It must face the correct direction. A reversed filter may still fit, but it will not perform as intended.

Work gently. Plastic clips can break, especially in older vehicles. Check the housing for leaves, dust, or dampness before installing the new filter. The job often takes fifteen minutes, though awkward access can slow you down. This guide also acknowledges an imperfect truth: even careful installation can reveal damaged seals, missing covers, or instructions that vary between vehicles. When that happens, pause and verify rather than forcing the part.
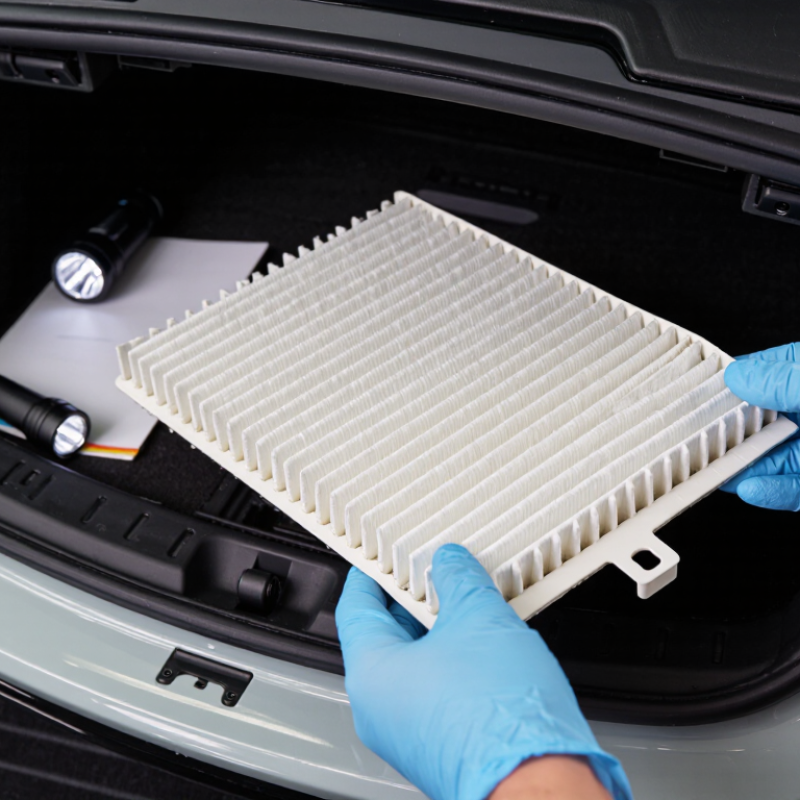
2026 Top Guide How to Install a Custom Fit Cabin Air Filter?

Identify the Correct Custom-Fit Cabin Air Filter for Your Vehicle

Before installing a custom-fit cabin air filter, confirm the vehicle’s exact year, body style, engine option, and trim. Small differences can change the filter housing. Use the owner’s manual or reliable vehicle-fitment data. A registration document may help, but it can contain incomplete information.

Remove the old filter and compare its length, width, thickness, and frame shape. Check the airflow arrow carefully. It should point in the same direction as the original filter. Do not confuse a cabin filter with an engine air filter. They serve different systems. Measure the compartment if the old filter is damaged or missing. Dust around the slot may reveal a poor previous fit.

Look for a tight seal without forcing the filter into place. A correct filter should slide smoothly and sit flat. Some vehicles use a filter cover with clips, while others require gentle panel removal. I once found a filter installed upside down, even though it looked clean. That mistake can reduce airflow and trap debris incorrectly. Charcoal or fine-particle versions may suit dusty roads, but thicker media can restrict air movement in some systems. Check the vehicle instructions before choosing. Recheck the cover, clips, and glove compartment alignment after installation. Loose parts can create rattling sounds.

2026 Top Guide: How to Install a Custom-Fit Cabin Air Filter?

Identify the Correct Custom-Fit Cabin Air Filter for Your Vehicle

Before installation, confirm the vehicle-specific part number in the owner's manual or fitment catalog. Compare the replacement filter with the old one for length, width, height, airflow direction, pleat orientation, and locating tabs. A filter that looks similar but has different dimensions may not seal correctly.

The chart shows common service-reference intervals for different driving conditions. Actual replacement timing varies by vehicle and climate, so the manufacturer's maintenance schedule should take priority.

Gather Tools and Prepare the Cabin Air Filter Housing

Before installing a custom-fit cabin air filter, gather the right tools and protect the vehicle’s interior. You may need a flashlight, gloves, a trim removal tool, a small screwdriver, and a soft brush. Keep a clean cloth and a waste bag nearby. A vacuum with a narrow nozzle can remove leaves and dust from the housing. Turn off the ignition and read the vehicle’s service manual. Housing locations vary, often behind the glove compartment or beneath the windshield cowl.

Open the filter housing carefully and release each clip without forcing it. Some covers use screws, while others slide into guide rails. Inspect the old filter before removing it. Its dirt pattern may reveal airflow direction or moisture problems. Match the new filter’s size, frame, and airflow arrow with the original.

A custom fit should sit evenly, without bending or loose edges. Small gaps can allow unfiltered air into the cabin.

Clean the housing gently, but avoid pushing debris deeper into the blower area. Check the seal for cracks and wipe the contact surfaces dry.

I once installed a filter with the correct dimensions but reversed airflow direction. The fan sounded normal, yet filtration performance was reduced. That mistake was easy to miss.

Do not rush this step. If a clip feels unusually tight, pause and inspect the manual instead of applying extra force. Refit the cover securely, then test the blower at several speeds. Pay attention to unusual noise or weak airflow.

Remove the Old Filter and Clean the Filter Compartment

Before fitting a custom cabin air filter, switch off the ignition and open the filter compartment carefully. In many vehicles, the compartment sits behind the glove box. Release each clip gently, because brittle plastic can crack in cold weather. Note the old filter’s airflow arrow before removal. A quick phone photo helps, although I sometimes forget this step.

Slide out the old filter without shaking it. Dust, leaves, and dark fibers may fall into the housing. Use a small vacuum with a soft brush attachment. Wipe the compartment with a dry or slightly damp microfiber cloth. Do not reinstall the filter while the housing is wet. Moisture can encourage odors and microbial growth. Leave stubborn debris alone rather than forcing it deeper into the blower.

The U.S. Environmental Protection Agency reports that indoor pollutant levels can be two to five times higher than outdoor levels, and sometimes much higher. A vehicle cabin is not the same test environment, so this figure should not be treated as a direct vehicle measurement. Still, it shows why compartment cleanliness matters. SAE and ISO filter-testing practices also emphasize controlled airflow and particle performance, not appearance alone. Check the seal, airflow direction, and housing edges before closing the cover. My imperfect habit is rushing the final inspection. That small mistake can leave gaps around the filter.

Install the New Filter in the Correct Airflow Direction

A custom-fit cabin air filter works only when air passes through its media in the intended direction. The airflow arrow usually points toward the blower motor, not toward the windshield. Check the filter housing before removing the old unit. Take a quick phone photo. It prevents a surprisingly common mistake.

The U.S. Environmental Protection Agency reports that indoor pollutant levels can be two to five times higher than outdoor levels. Vehicle cabins are smaller, enclosed spaces, so filter placement matters. An incorrectly reversed filter may still fit, but its pleat structure can load unevenly. This may reduce airflow and increase fan noise. In practice, I also inspect the old filter’s dust side. Dust normally faces the incoming air, but this clue is not a substitute for the housing arrow.

Look for labels such as “AIR FLOW” or “UP.” “UP” indicates position, not necessarily airflow direction. If the housing has no marking, consult the vehicle service information and compare the filter’s frame with the original. Do not force the cover. A crushed edge can create a bypass gap around the filter. SAE automotive filtration procedures evaluate pressure drop and particle performance, showing why a sealed fit matters. I have occasionally installed a filter too quickly and missed a folded corner. That small error deserved a second inspection. Turn the blower on briefly afterward. Listen for rattling, weak airflow, or unusual resistance.

Inspect the Installation and Test the Vehicle’s Ventilation System

After fitting a custom-fit cabin air filter, inspect the housing before closing the glove compartment. The filter should sit flat, without folded corners or visible gaps. Match the airflow arrow with the direction marked inside the slot. A reversed filter may still fit, but it can reduce airflow. Check that the cover clips engage evenly and that no wiring is trapped. Use a small flashlight around the frame. Small gaps matter. My first inspection was too quick, and I missed a slightly lifted edge.

Test the vehicle’s ventilation system at low, medium, and high fan speeds. Select the face, floor, and windshield vents separately. Then switch between fresh-air and recirculation modes. Air should come through the selected outlets with steady pressure. Listen for rattling, scraping, or sudden changes in fan noise. Place your hand near each vent and compare the airflow. Check the windshield setting carefully, because restricted airflow may affect clearing performance. A mild new-filter smell can occur, but strong odors deserve another inspection. If airflow feels weak, turn the system off and reseat the filter. Debris near the housing can also interfere with the seal. Do not force the cover closed. A poor fit can distort the filter or allow unfiltered air around it. Allow extra time for this check; rushing here is an easy mistake.

FAQS

How do I identify the correct custom-fit cabin air filter?

Confirm the vehicle’s year, body style, engine option, and trim. Small differences can change the filter housing. Check the owner’s manual or reliable fitment data. Registration documents may be incomplete.

What should I compare before installing the new filter?

Compare the old filter’s length, width, thickness, frame shape, and airflow arrow. If the old filter is missing, measure the compartment carefully. Look for dust around the slot. It may reveal a poor previous fit.

How can I avoid confusing two different air filters?

A cabin filter serves the passenger compartment. An engine filter serves the engine intake. Their shapes and locations differ. Check the service manual when uncertain.

Which tools should I prepare?

Gather a flashlight, gloves, a small screwdriver, and a trim removal tool. Keep a soft brush, clean cloth, waste bag, and narrow vacuum nozzle nearby. Simple tools help.

Where is the cabin filter housing usually located?

The housing is often behind the glove compartment or beneath the windshield cowl. Locations vary by vehicle. Remove panels gently. Some covers use clips, screws, or guide rails.

How should I install the filter?

Match its size, frame, and airflow arrow with the original. The arrow should point in the same direction. The filter should slide smoothly and sit flat. Never force it into place.

What happens if the airflow arrow points the wrong way?

Filtration may become less effective, and debris can collect incorrectly. The blower may sound normal, so the mistake is easy to miss. I once overlooked this exact problem.

Should I choose a charcoal or fine-particle filter?

These versions may help on dusty roads. However, thicker filter material can restrict airflow in some systems. Check the vehicle instructions before choosing. More filtration is not always better.

How do I check the installation afterward?

Make sure the cover, clips, and glove compartment align securely. Loose parts may create rattling sounds. Run the blower at several speeds. Watch for weak airflow or unusual noise.

What should I do if a clip feels unusually tight?

Stop and inspect the manual before applying extra force. Check for hidden screws or incorrect panel movement. Forcing the clip may damage the housing. I might still miss a hidden fastener.

Conclusion

Learning how to install a custom-fit cabin air filter? Start by confirming that the replacement filter matches your vehicle’s model, year, and ventilation system. Prepare basic tools, switch off the vehicle, and locate the cabin air filter housing, which is commonly positioned behind the glove compartment or beneath the dashboard. Carefully open the housing and note the direction of the airflow arrow before removing the old filter.

Clean dust and debris from the compartment without damaging nearby components. Insert the new filter with its airflow indicator pointing in the correct direction, making sure it sits flat and securely inside the housing. Reattach the cover and restore any removed panels. Finally, inspect the installation for gaps or loose parts, start the vehicle, and test the fan at several speeds. Proper installation can help maintain cleaner cabin air, support efficient ventilation, and reduce unusual odors or airflow restrictions.

Amelia

Amelia

Amelia is a seasoned marketing professional with a wealth of expertise in our company’s core offerings. With an unwavering passion for driving growth and innovation, she plays a pivotal role in shaping our marketing strategies and enhancing brand visibility. A key aspect of her responsibilities......